Today I have another tutorial for you, this time discussing how you can import new animations into Unreal Engine and re target them against your character.
For my example I will be using a character from Mixamo, which is a site support by Adobe that has various 3d models and animation resources for folks to use. Since the animations come with their own skeletal definitions you have to re target them otherwise they will be unusable when you bring them into Unreal.
Coming from a Java background it was nice to see that the JetBrains folks have also brought their IDE wizardry to C++ in the form of CLion.
Please note that I am running this setup with the following app / os versions but with some minor tweaks this should be transferable to macOS and linux.
Unreal Engine 4.20.3
CLion 2018.2
Windows 10
In order to get unreal going with CLion you need to do a few things
At this point we need to setup the Unreal side of the things
Open Unreal Editor ( source or binary doesn’t matter )
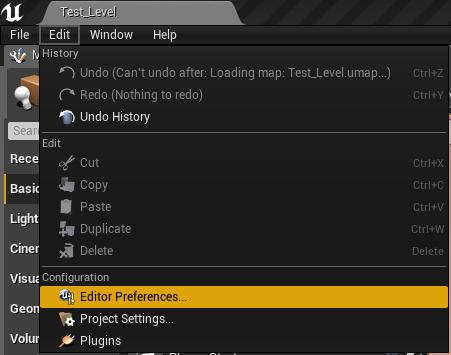
Go to Edit -> Editor Preferences
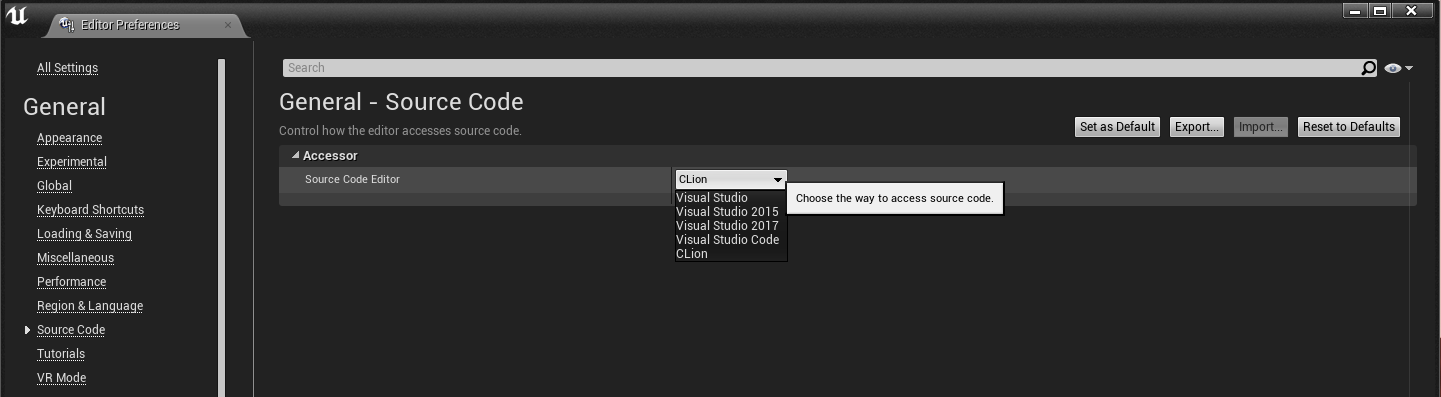
Then go to General -> Source Code -> Source Code Editor and select CLion
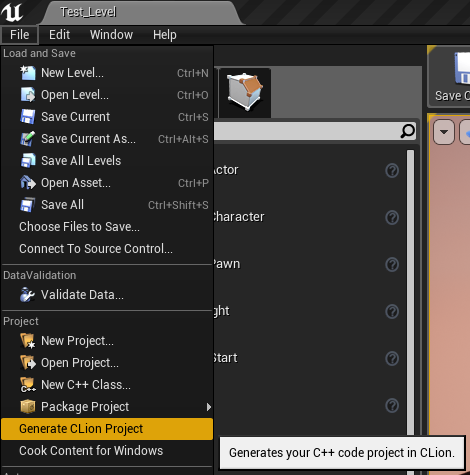
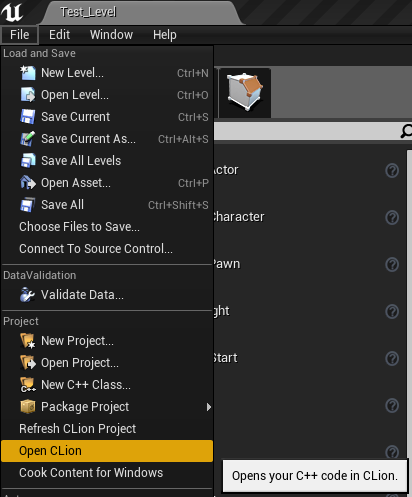
Once this is done you should now be able to generate a new CLion project using File -> Generate CLion Project
This generation step will take a few seconds to complete
Once complete you should restart Unreal Editor before opening up CLion
NOTE: not sure why this occurs but generating the project and launching it immediately does not correctly configure it. I found that making adjustments to the CMakeLists.txt file and setting the build process to Release prior to launching CLion seems to clear up a lot of things. See below for details.
To open up CLion go to File -> Open CLion
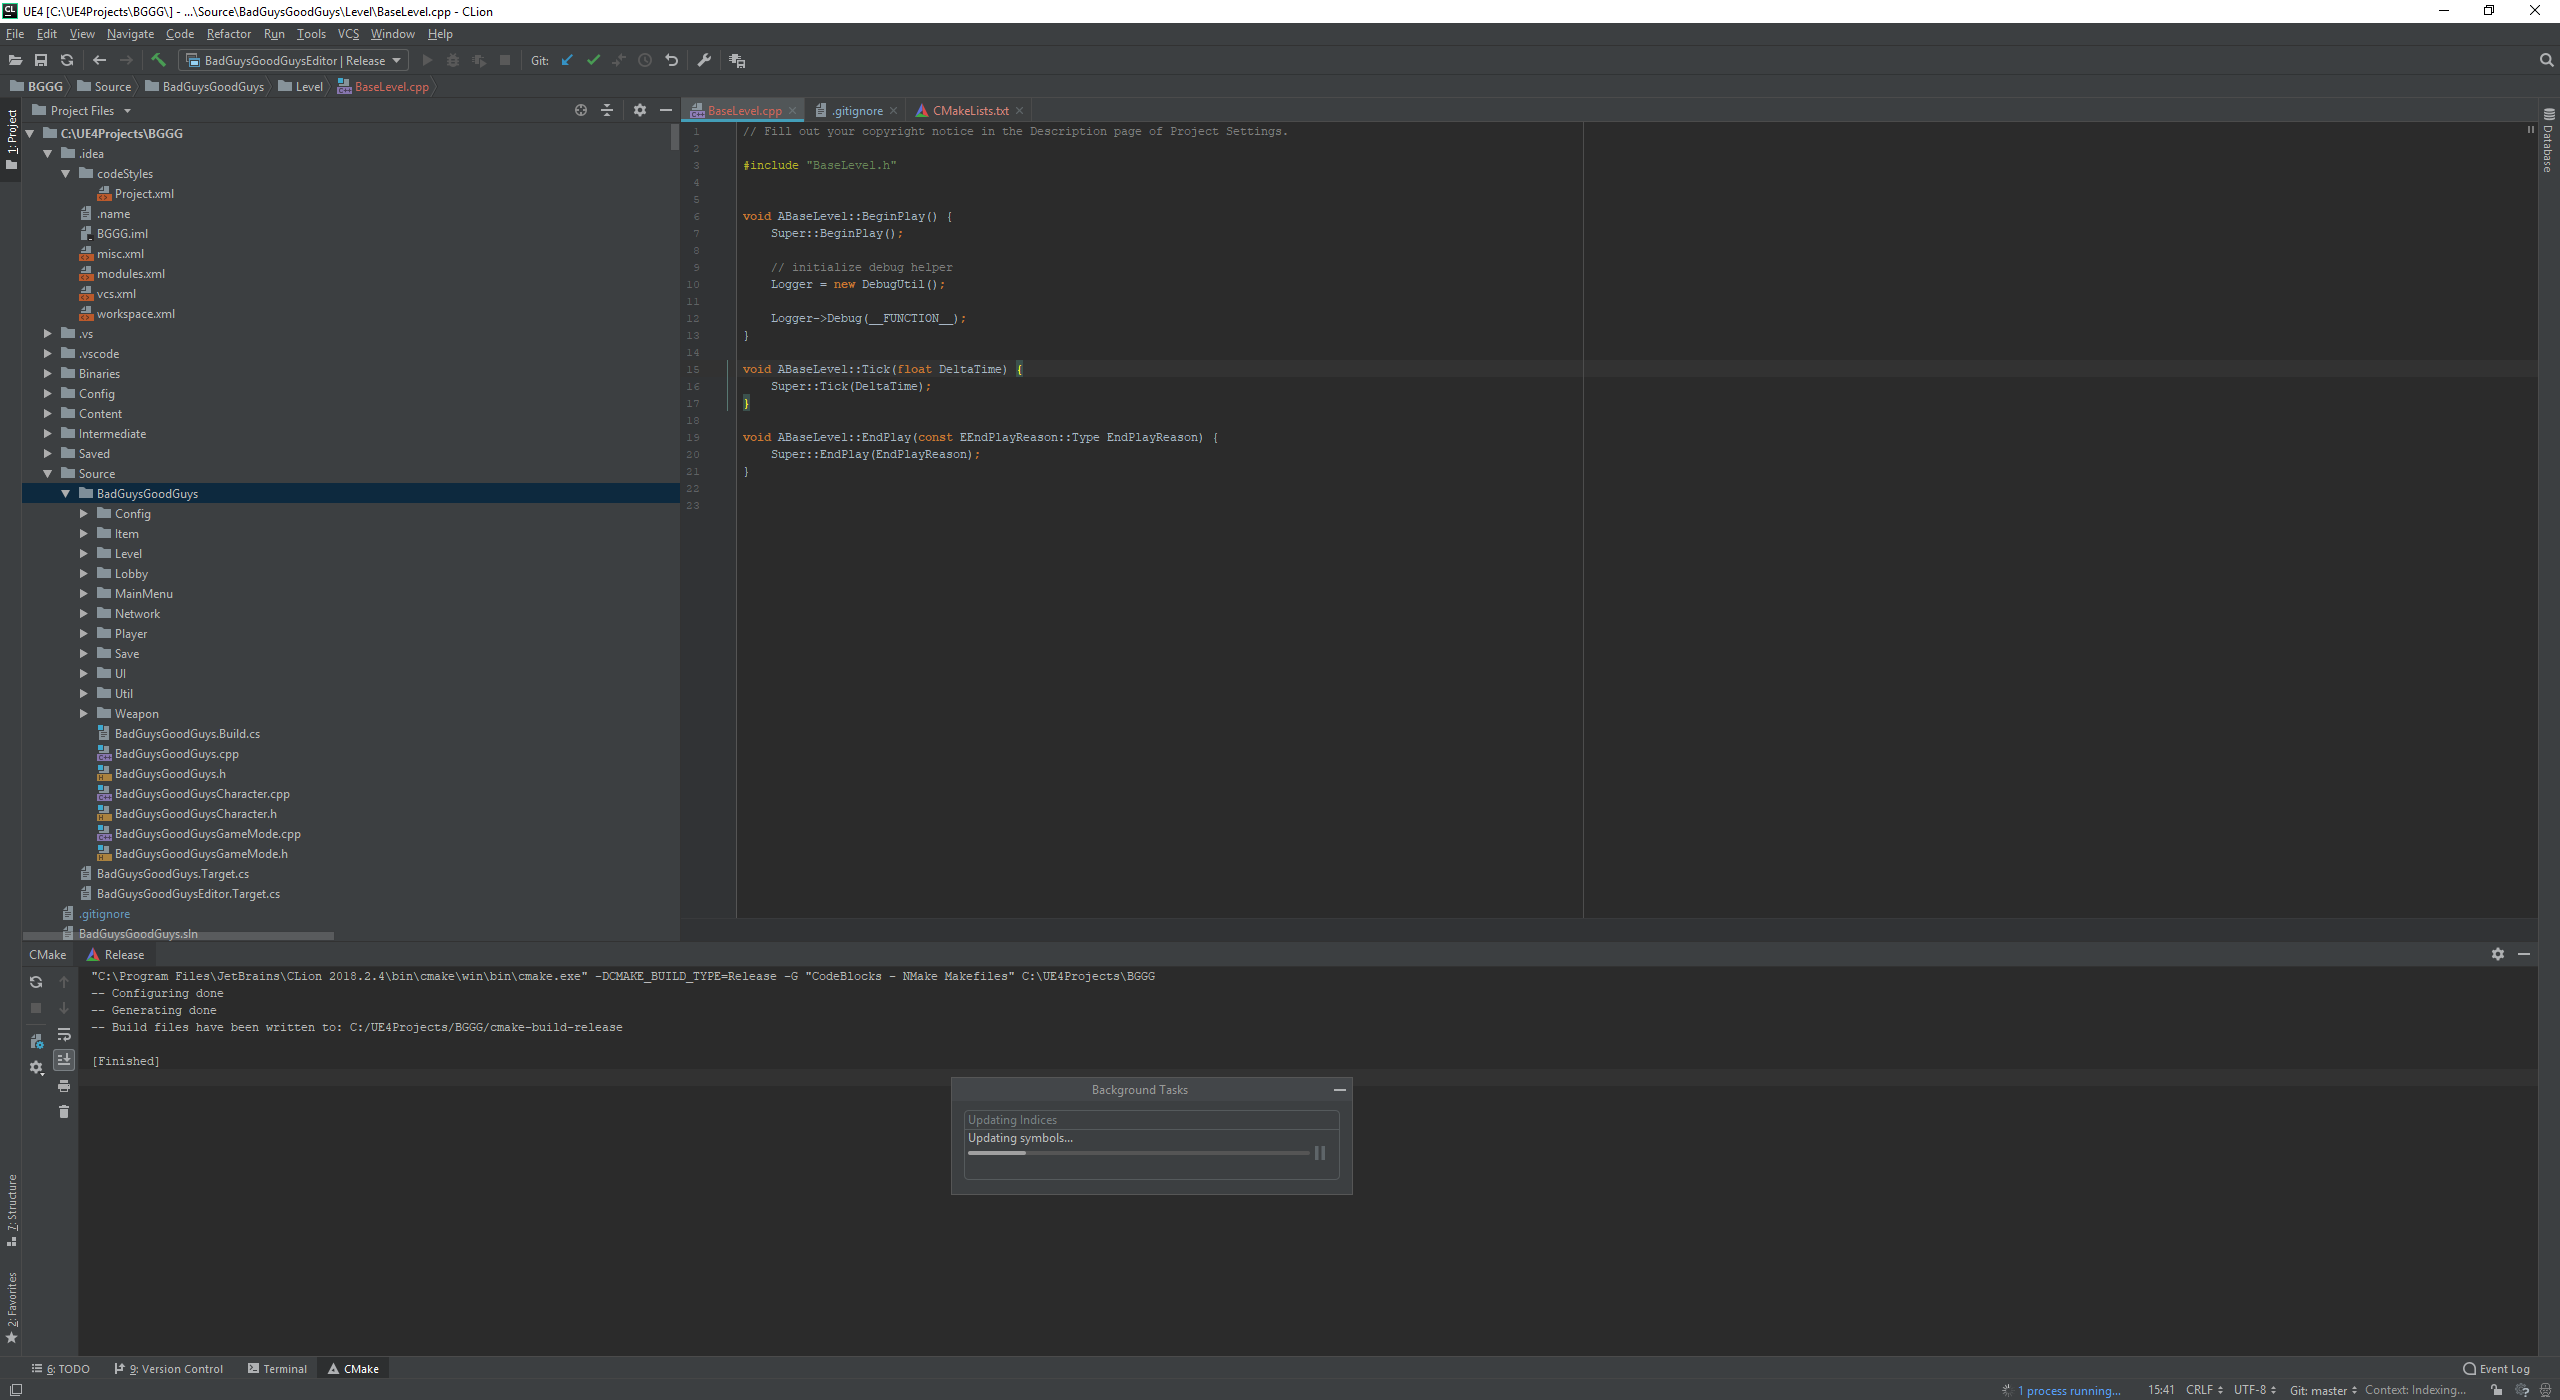
At this point Unreal should be launching CLion and presenting you with your project structure that looks similar to this.
Almost there, we just have a few more things to complete before you are able to get back to building your game:
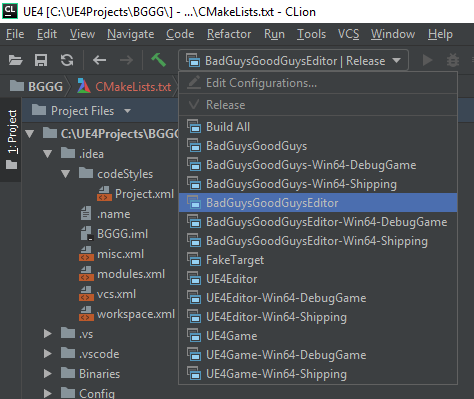
Ensure that you are picking your Project + Editor as your Build Target. This is so you can compile in CLion and get hot swapping in Unreal Editor.
Alternatively if you are building different targets make sure those are selected.
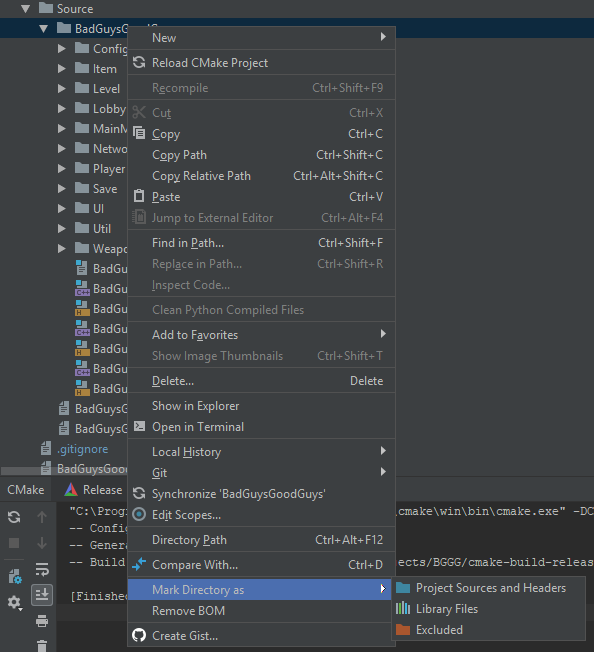
Ensure that you mark your Source folder as part of CLion project definitions so intellisense / autocomplete works correctly
This is not required but helps with navigating your project
That’s it !
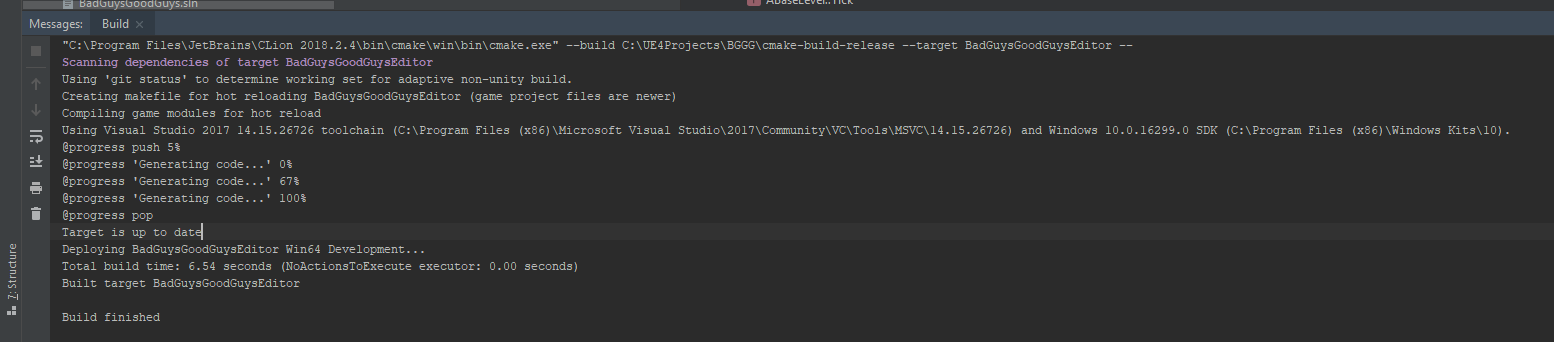
And that is it as far as configuration goes. You should be able to build your project using CTRL + F9 and see your changes reflected in the Unreal Editor / your game.
The compile times are similar to Visual Studio but the richness of the CLion tool suite makes development a lot easier to traverse. Specifically have a look at the various shortcuts that come with CLion.
Additional Troubleshooting
There are a handful of issues I ran into while compiling this article. If you come across anything similar here are a few instructions that should hopefully help.
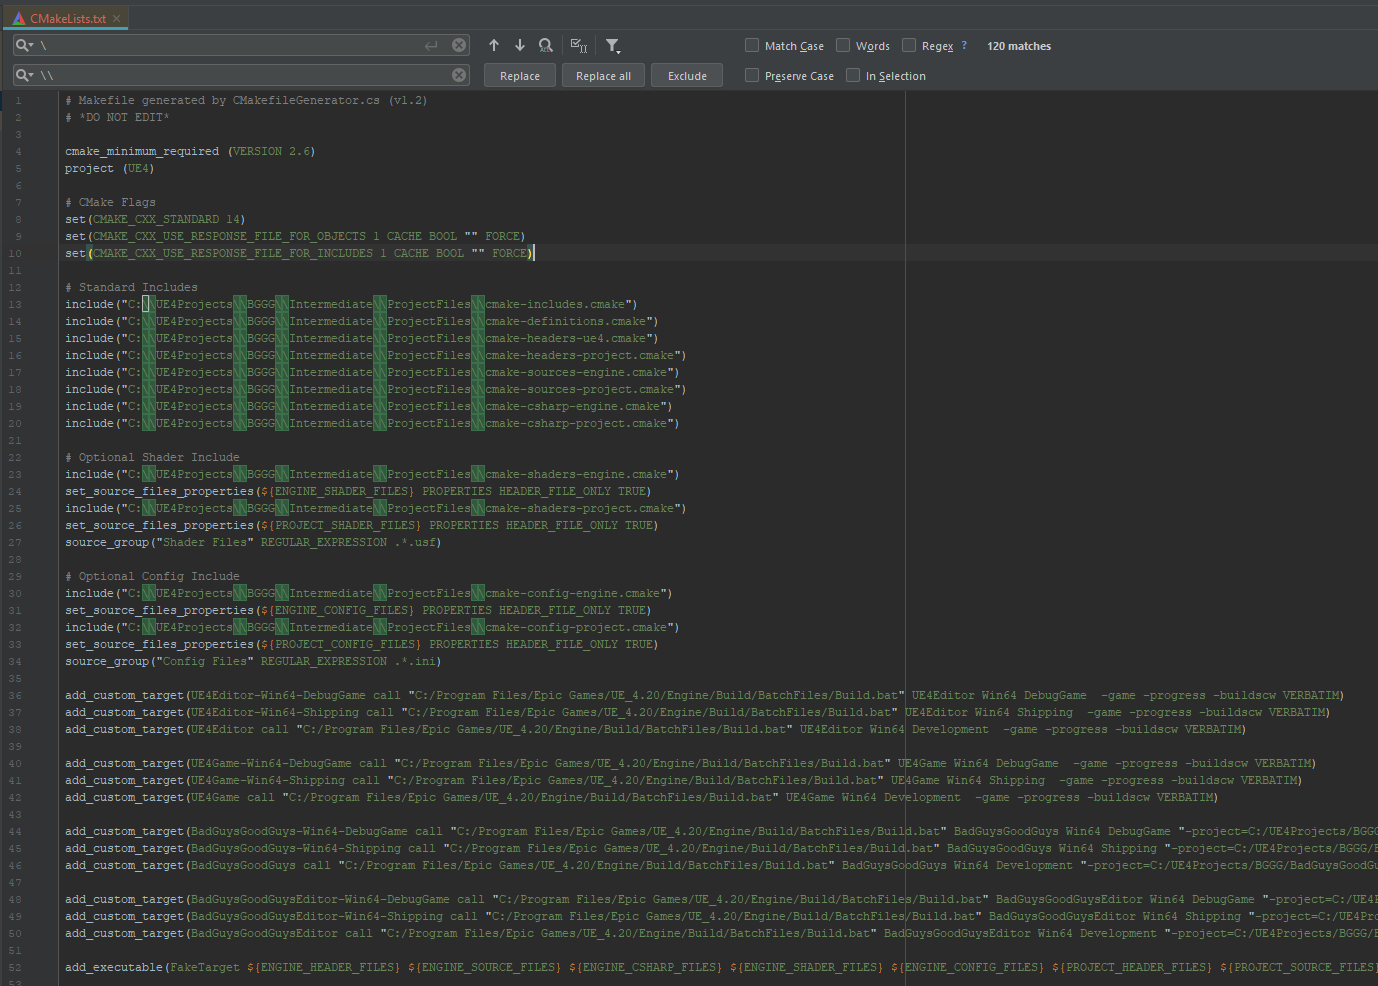
Dealing with invalid CMakeLists.txt file
The CMakeLists.txt file when generated by Unreal sometimes will contain non escaped backslashes, \ vs \\ , which will have to be adjusted manually.
Example of invalid backslashes
Corrected versions.
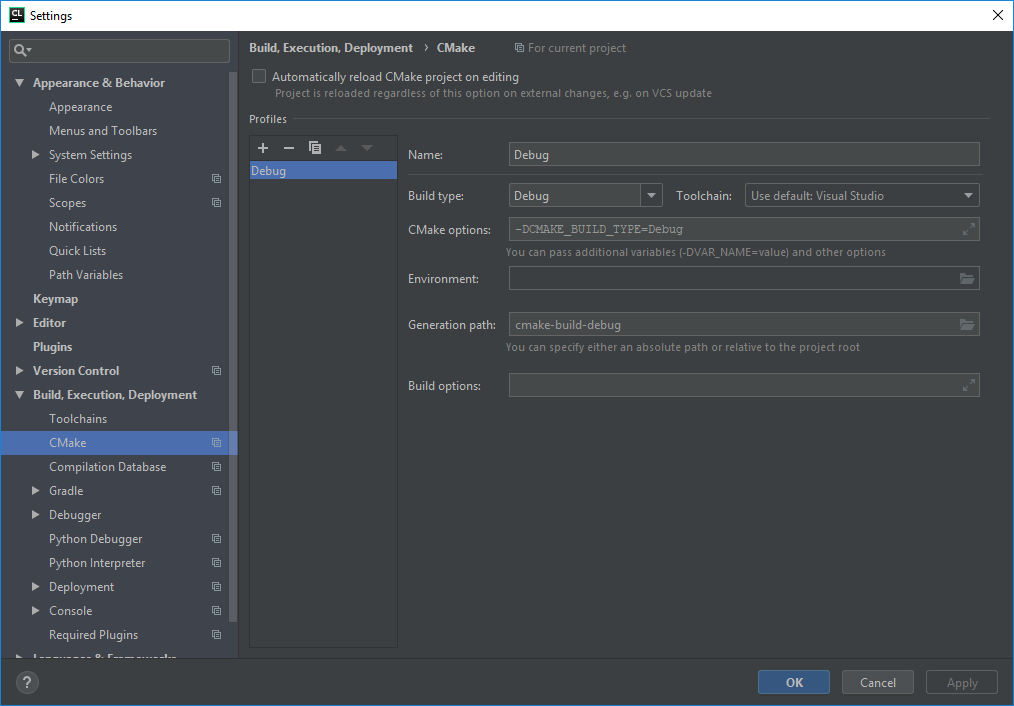
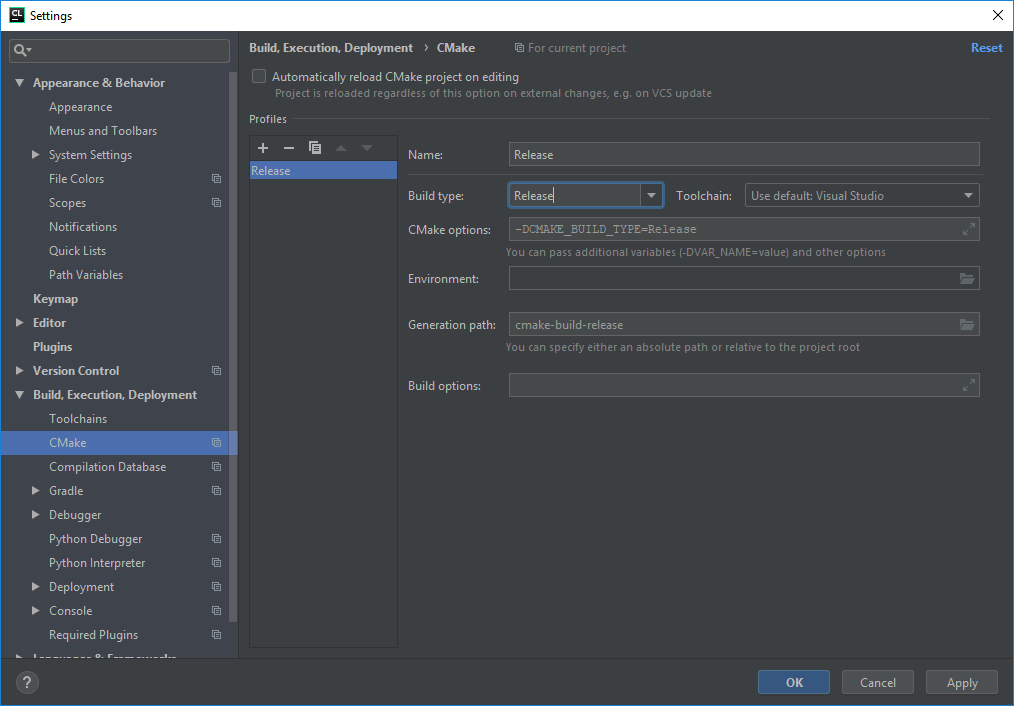
Command line error D8049
If you come across this error when trying to compile your CMakeLists.txt file it is most likely tied to building with Debug instead of Release.
To correct go to Settings -> Build, Execution, Deployment -> CMake and change the Build Type from Debug to Release.
Deleting CLion references and changing back to a different editor
In case you are not happy with CLion and want to revert things back to use Visual Studio I recommend cleaning up the files the CLion integration generated.
Specifically the following folders / files inside of your root project:
Once this is complete you simply follow the initial set of instructions but instead of picking CLion just select Visual Studio. This should then give you the option to re-generate the Visual Studio project within Unreal Editor ( File -> Refresh / Generate Visual Studio Project )