<style>.lazy{display:none}</style> Skip to main content
Category

Development

Animation Re-targeting with Unreal using Mixamo assets

By Development, Tutorial 9 Comments

Hey guys,

Today I have another tutorial for you, this time discussing how you can import new animations into Unreal Engine and re target them against your character.

For my example I will be using a character from Mixamo, which is a site support by Adobe that has various 3d models and animation resources for folks to use. Since the animations come with their own skeletal definitions you have to re target them otherwise they will be unusable when you bring them into Unreal.

You can also find the source code used in this tutorial on my GitHub page.

In addition to the video here is a quick map of the bones from the Unreal Mannequin and how they map against the Mixamo model.

Also a few more resources from Epic about animation re targeting.

Thanks for taking a look and stay tuned for more.

Unreal – Base

Mixamo

Root Hips
Pelvis Hips
spine_01 Spine
spine_02 Spine1
spine_03 Spine2
clavicle_l LeftShoulder
UpperArm_L LeftArm
lowerarm_l LeftForeArm
Hand_L LeftHand
clavicle_r RightShoulder
UpperArm_R RightArm
lowerarm_r RightForeArm
Hand_R RightHand
neck_01 Neck
Head head
Thigh_L LeftUpLeg
calf_l LeftLeg
Foot_L LeftFoot
Thigh_R RightUpLeg
calf_r RightLeg
Foot_R RightFoot

Unreal – Advanced

Mixamo

index_01_l LeftHandIndex1
index_02_l LeftHandIndex2
index_03_l LeftHandIndex3
middle_01_l LeftHandMiddle1
middle_02_l LeftHandMiddle2
middle_03_l LeftHandMiddle3
pinky_01_l LeftHandPinky1
pinky_02_l LeftHandPinky2
pinky_03_l LeftHandPinky3
ring_01_l LeftHandRing1
ring_02_l LeftHandRing2
ring_03_l LeftHandRing3
thumb_01_l LeftHandThumb1
thumb_02_l LeftHandThumb2
thumb_03_l LeftHandThumb3
lowerarm_twist_01_l
upperarm_twist_01_l
index_01_r RightHandIndex1
index_02_r RightHandIndex2
index_03_r RightHandIndex3
middle_01_r RightHandMiddle1
middle_02_r RightHandMiddle2
middle_03_r RightHandMiddle3
pinky_01_r RightHandPinky1
pinky_02_r RightHandPinky2
pinky_03_r RightHandPinky3
ring_01_r RightHandRing1
ring_02_r RightHandRing2
ring_03_r RightHandRing3
thumb_01_r RightHandThumb1
thumb_02_r RightHandThumb2
thumb_03_r RightHandThumb3
lowerarm_twist_01_r
upperarm_twist_01_r
calf_twist_01_l
ball_l LeftToeBase
thigh_twist_01_l
calf_twist_01_r
ball_r RightToeBase
thigh_twist_01_r
ik_foot_root
ik_foot_l
ik_foot_r
ik_hand_root
ik_hand_gun
ik_hand_l
ik_hand_r
Custom_1
Custom_2
Custom_3
Custom_4
Custom_5

How to use different Unreal C++ IDEs ( CLion / Visual Studio Code ) Tutorial

By Development, Tutorial No Comments

Hey guys,

Here is the first in a series of videos here at Jolly Monster !

This week we are going to cover a topic I discussed already but now you have it in a video format, exciting ! no ?

Specifically we are going to talk about Visual Studio Code and CLion as alternative IDEs for the Unreal Engine C++ workflow and some of the nuances that come with trying to integrate them.

Thank you all for your support and keep checking back for more.

Unreal C++ with Visual Studio Code

By Development, Tutorial 18 Comments

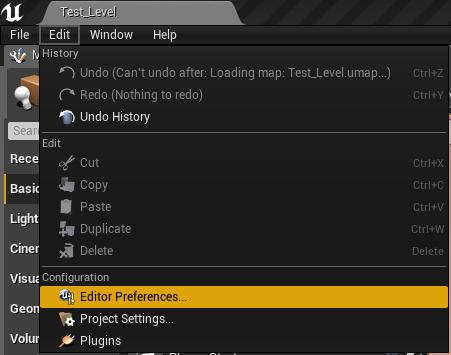
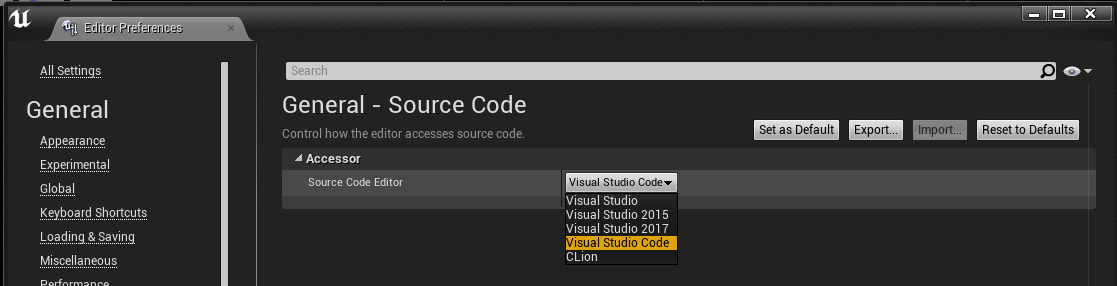
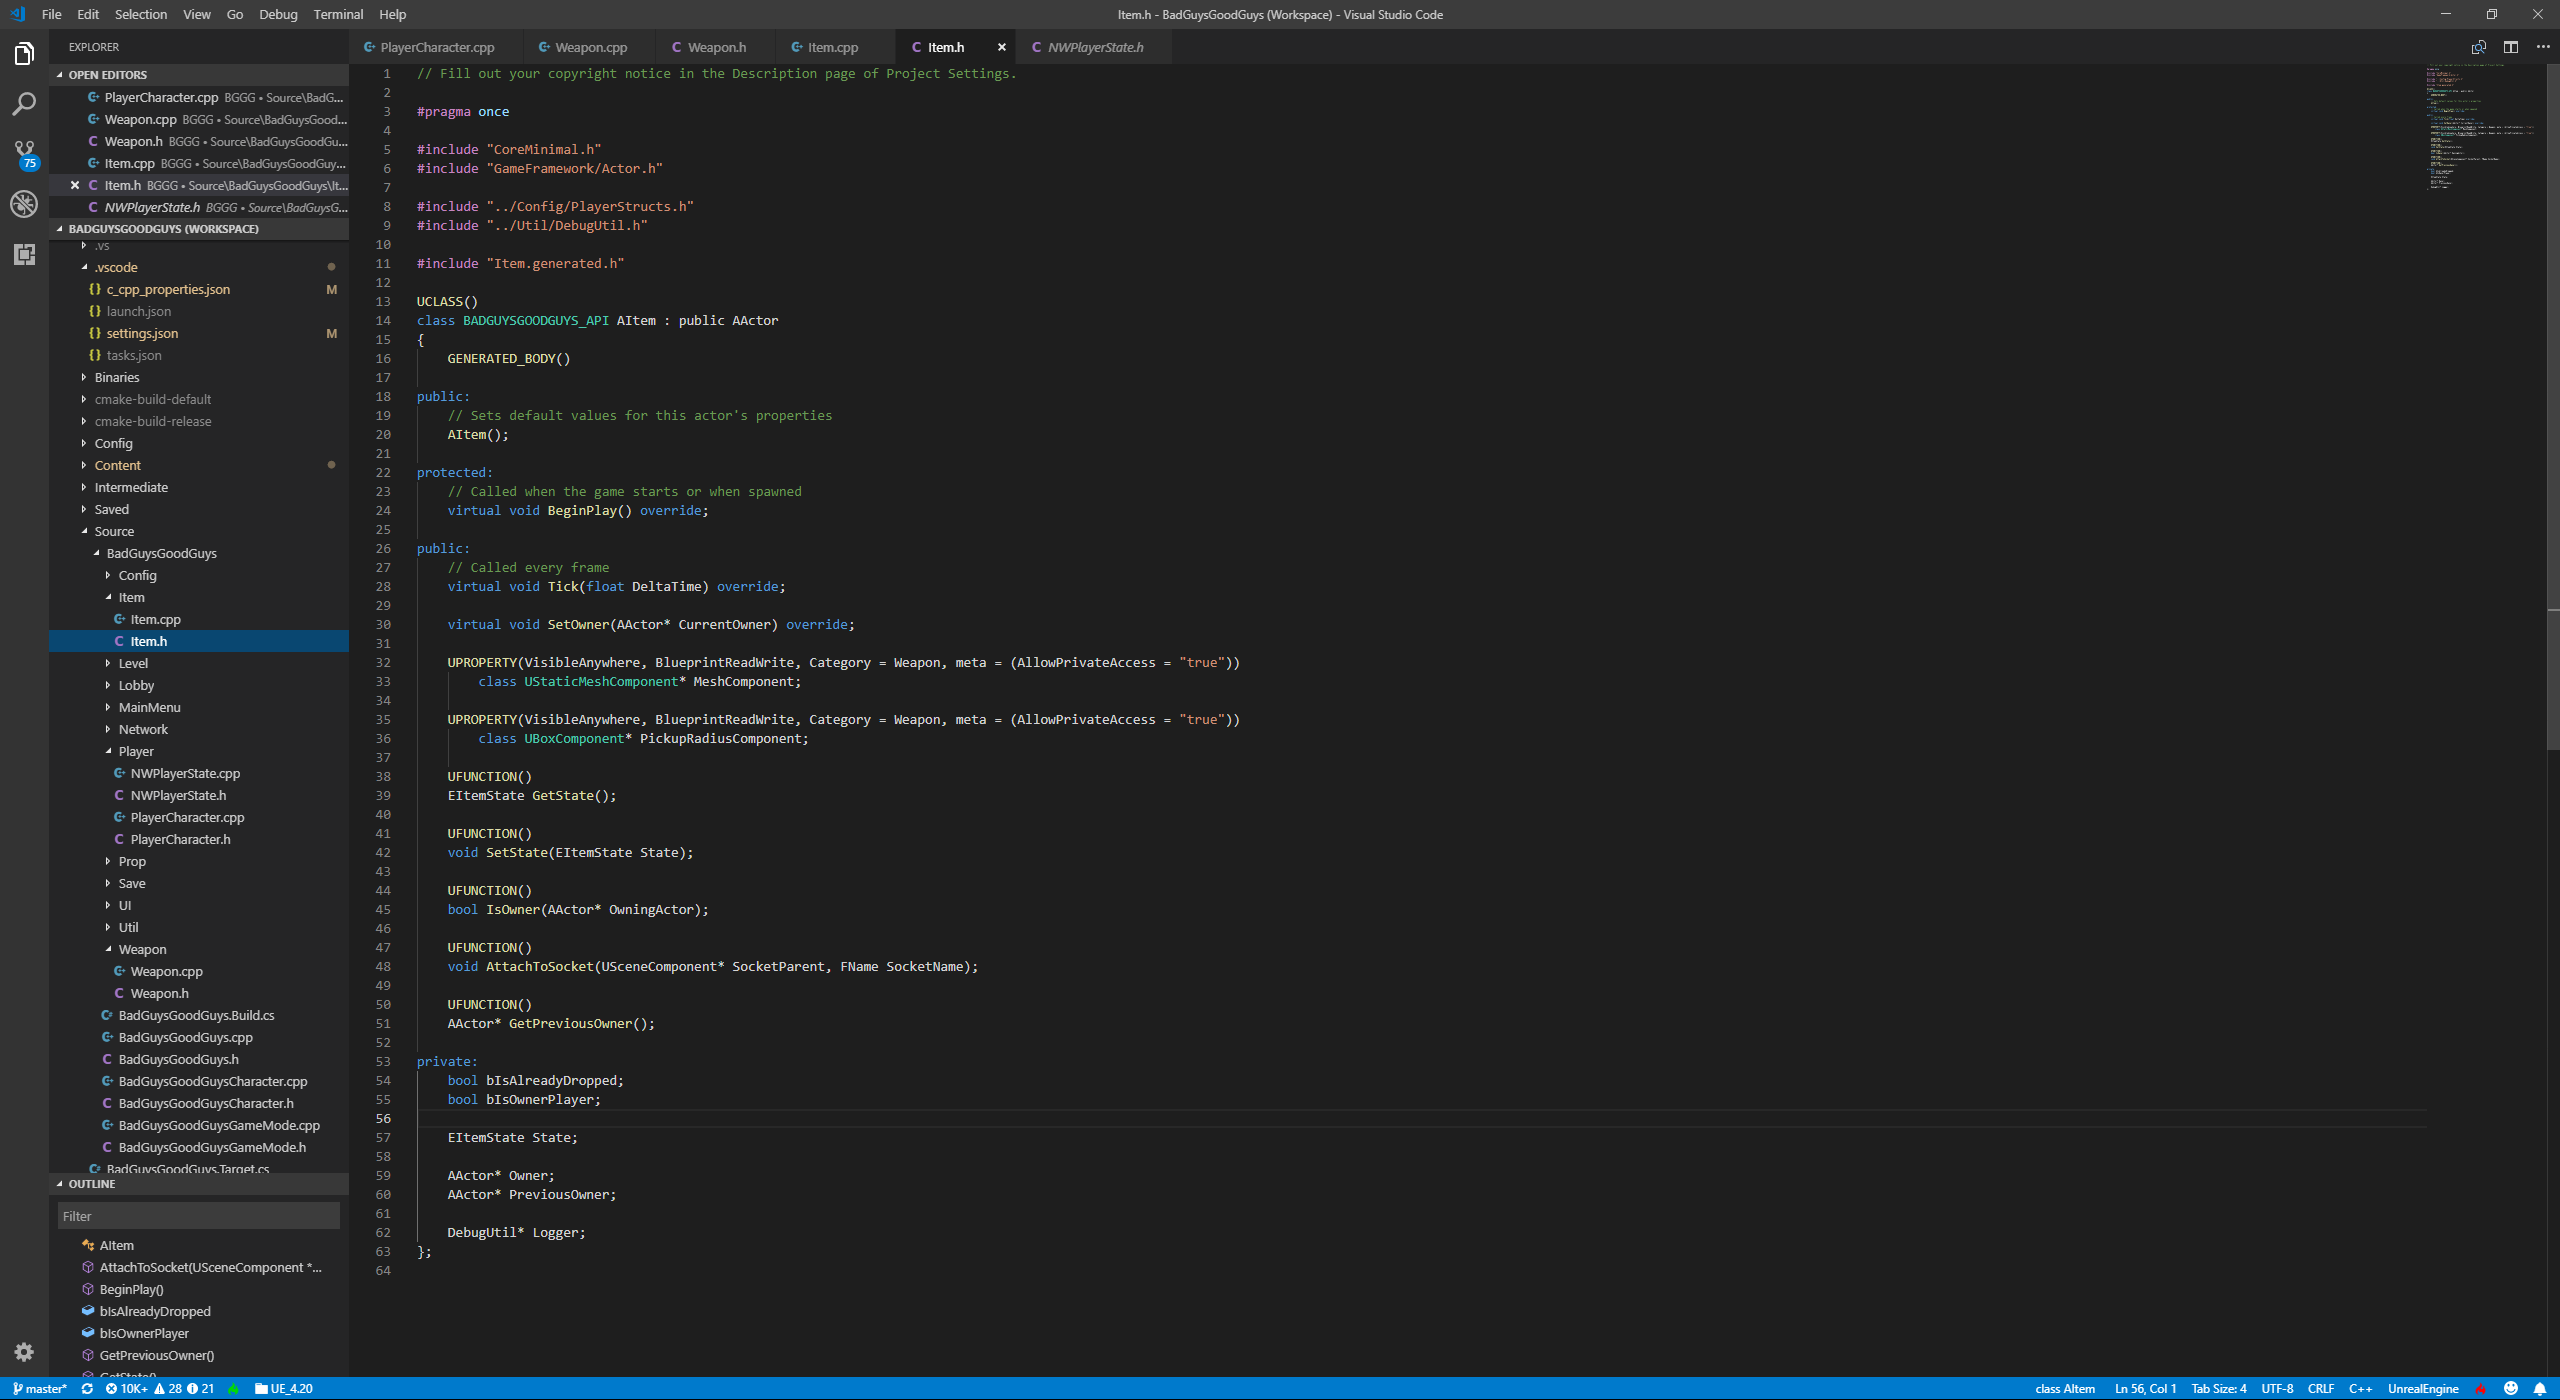
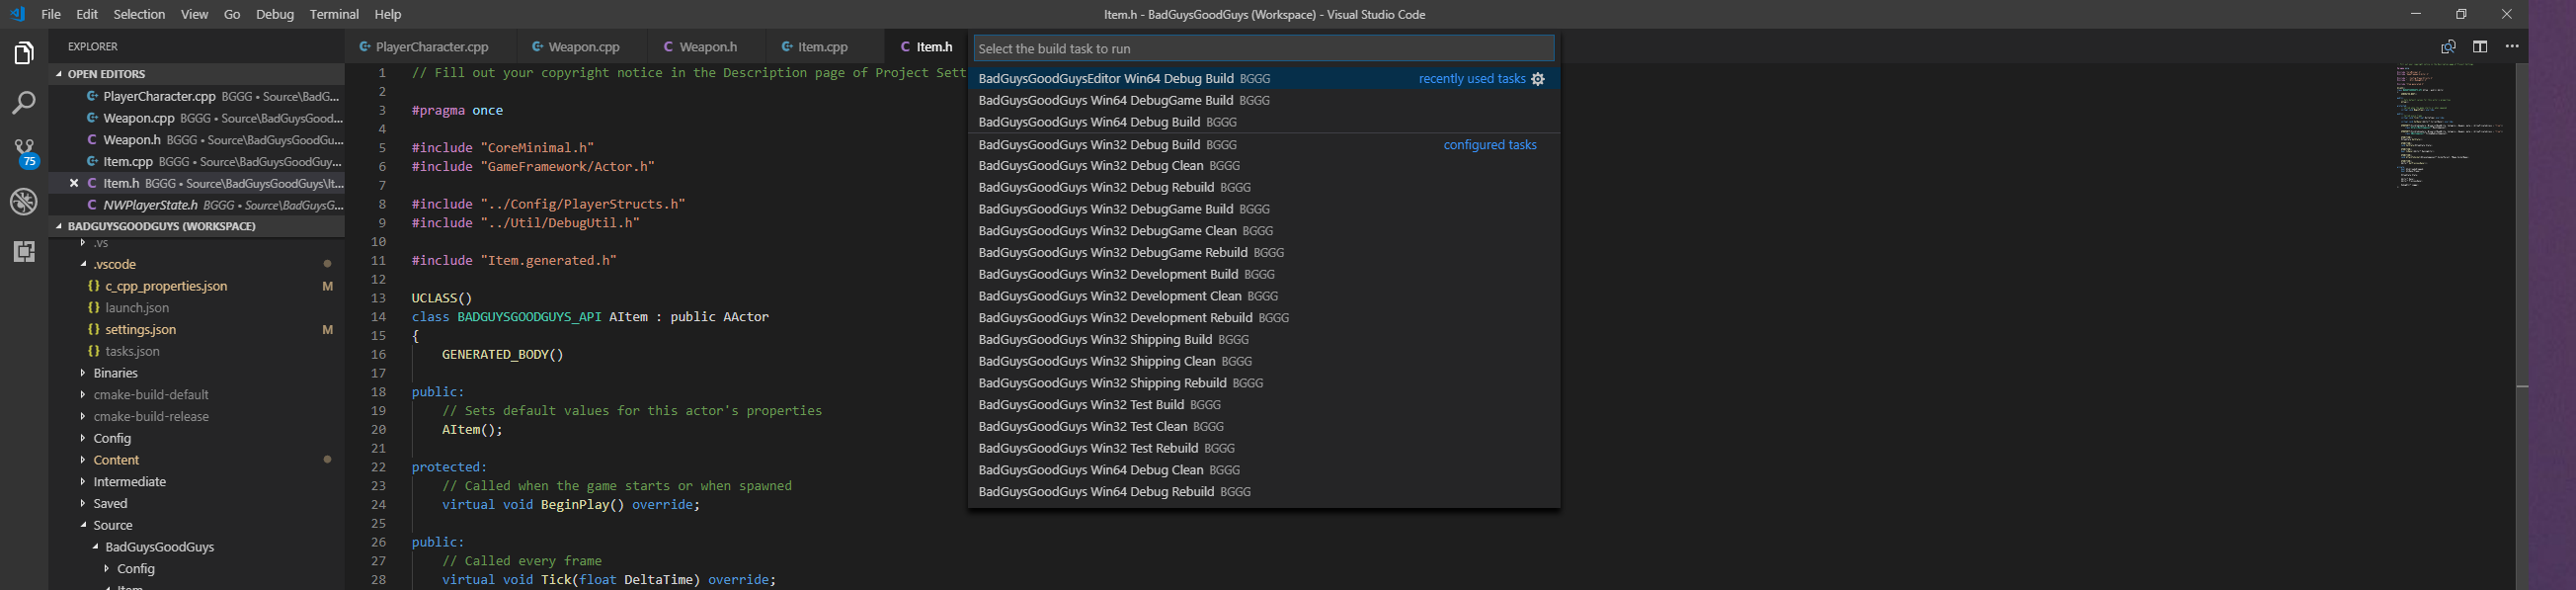
In the spirit of show casing alternative ways of working with Unreal and C++ I wanted to share with you guys how to use Visual Studio Code as your primary IDE.

Visual Studio Code is a fairly lean IDE based on the Electron framework that was designed to tap into the market of Sublime, Atom, etc etc but it works just fine as a C++ editor.

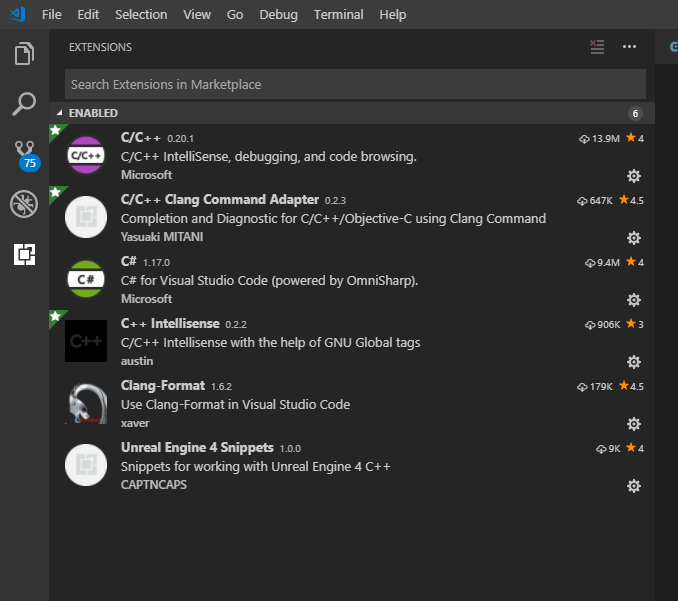
Similar to my earlier post there are a few prerequisites you need to have available / installed to follow this tutorial:

  • Ensure that you either have Visual Studio Community 2017  installed or alternatively just the Visual Studio Build Tools as you need something to still compile the code.
    • Visual Studio Code will recognize what you have these packages installed and assign the correct compiler configurations
  • Unreal Engine 4.20.3
  • Visual Studio Code
  • Windows 10

Once you have these pieces installed, let’s move onto the Unreal Editor configuration

  • Open Unreal Editor ( source or binary doesn’t matter )
  • Go to Edit -> Editor Preferences

  • Then go to General -> Source Code -> Source Code Editor and select Visual Studio Code

  • Once this is done you should now be able to generate a new Visual Studio Code project  using File -> Generate Visual Studio Code Project

  • This generation step will take a few seconds to complete
  • To open up Visual Studio Code go to File -> Open Visual Studio Code

You should now be able to see the IDE getting launched from Unreal and your project available for compilation.

The only other thing you need to be aware of is how to get at the build targets.

To do so you can go to Terminal -> Run Build Task or simply hit CTRL + SHIFT + B

That’s it !

You are now setup to use Visual Studio Code.


Additional Information

The only other thing you may want to setup within Visual Studio Code are a number of plugins that assist with intellisense, auto complete, etc etc

Here is a list of plugins I currently have configured:

Deleting Visual Studio Code references and changing back to a different editor

In case you are not happy with Visual Studio Code and want to revert things back to use Visual Studio I recommend cleaning up the files the VS Code integration generated.

Specifically the following folders / files inside of your root project:


.vscode/
[PROJECTNAME].code-workspace

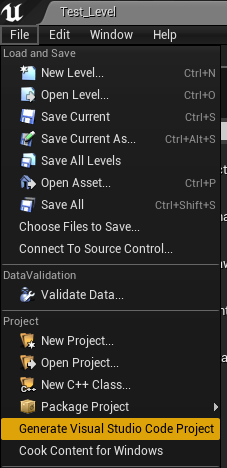
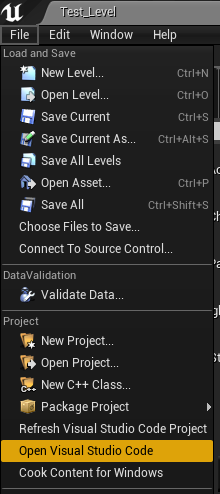
Once this is complete you simply follow the initial set of instructions but instead of picking VS Code just select Visual Studio 2015/2017. This should then give you the option to re-generate the Visual Studio project within Unreal Editor ( File -> Refresh / Generate Visual Studio Project )